How to Download Data Analysis for Excel on PC or Mac. In this Article: Using Windows Using Mac Community Q&A. This button is between Format and Data on the menu bar at the top of your screen. It will open a drop-down menu. Click Add-ins on the Tools menu. ToolPak differs between Mac and PC. Installing the Analysis ToolPak on Windows. Select the File tab 2. Select Options 3. Select Add-Ins 4. Under Manage click “Go.” Then “Excel Add-Ins” is selected, and click Go. Check the Analysis ToolPak and Analysis ToolPak VBA buttons and click OK 6. Watch video If the Data Analysis command is not available in your version of Excel, you need to load the Analysis ToolPak add-in program. These instructions apply to Excel 2010, Excel 2013 and Excel 2016. Click the File tab, click Options, and then click the Add-Ins category. In the Manage box, select Excel Add-ins and then click Go. It also includes anti-phishing technology to prevent hackers from tricking you into revealing your bank account password and a firewall to prevent hackers from forcibly breaking into your computer. By Perhaps the most common Data Analysis tool that you’ll use in Excel is the one for calculating descriptive statistics. To see how this works, take a look at this worksheet. It summarizes sales data for a book publisher. In column A, the worksheet shows the suggested retail price (SRP). In column B, the worksheet shows the units sold of each book through one popular bookselling outlet. You might choose to use the Descriptive Statistics tool to summarize this data set. To calculate descriptive statistics for the data set, follow these steps. Excel For Data Analysis• Click the Data tab’s Data Analysis command button to tell Excel that you want to calculate descriptive statistics. Excel displays the Data Analysis dialog box. • In Data Analysis dialog box, highlight the Descriptive Statistics entry in the Analysis Tools list and then click OK. Excel displays the Descriptive Statistics dialog box. • In the Input section of the Descriptive Statistics dialog box, identify the data that you want to describe. • To identify the data that you want to describe statistically: Click the Input Range text box and then enter the worksheet range reference for the data. In the case of the example worksheet, the input range is $A$1:$C$38. Note that Excel wants the range address to use absolute references — hence, the dollar signs. To make it easier to see or select the worksheet range, click the worksheet button at the right end of the Input Range text box. When Excel hides the Descriptive Statistics dialog box, select the range that you want by dragging the mouse. Then click the worksheet button again to redisplay the Descriptive Statistics dialog box. • To identify whether the data is arranged in columns or rows: Select either the Columns or the Rows radio button. Excel Data Analysis Button 2010 For Mac• To indicate whether the first row holds labels that describe the data: Select the Labels in First Row check box. In the case of the example worksheet, the data is arranged in columns, and the first row does hold labels, so you select the Columns radio button and the Labels in First Row check box. • In the Output Options area of the Descriptive Statistics dialog box, describe where and how Excel should produce the statistics. • To indicate where the descriptive statistics that Excel calculates should be placed: Choose from the three radio buttons here — Output Range, New Worksheet Ply, and New Workbook. Typically, you place the statistics onto a new worksheet in the existing workbook. To do this, simply select the New Worksheet Ply radio button. Wd my passport for mac software. • To identify what statistical measures you want calculated: Use the Output Options check boxes. Select the Summary Statistics check box to tell Excel to calculate statistical measures such as mean, mode, and standard deviation. Select the Confidence Level for Mean check box to specify that you want a confidence level calculated for the sample mean. Note: If you calculate a confidence level for the sample mean, you need to enter the confidence level percentage into the text box provided. Use the Kth Largest and Kth Smallest check boxes to indicate you want to find the largest or smallest value in the data set. After you describe where the data is and how the statistics should be calculated, click OK. Here are the statistics that Excel calculates. Statistic Description Mean Shows the arithmetic mean of the sample data. Excel Data Analysis Button Excel 2016Standard Error Shows the standard error of the data set (a measure of the difference between the predicted value and the actual value). Median Shows the middle value in the data set (the value that separates the largest half of the values from the smallest half of the values). Mode Shows the most common value in the data set. Standard Deviation Shows the sample standard deviation measure for the data set. Sample Variance Shows the sample variance for the data set (the squared standard deviation). Kurtosis Shows the kurtosis of the distribution. Skewness Shows the skewness of the data set’s distribution. 
Range Shows the difference between the largest and smallest values in the data set. Minimum Shows the smallest value in the data set. Maximum Shows the largest value in the data set. Sum Adds all the values in the data set together to calculate the sum. Count Counts the number of values in a data set.
0 Comments
I have created a new CV (Resume) in Microsoft Word on my work computer, it is using the latest version of Office. When I attempted to open the document in Pages on my home Mac, the formatting was slightly incorrect, but the main issue is it is missing two pages! The exact same document when opened in Word has three pages but in Pages, it only has one! I have had nothing but problems with Pages since I bought it! Can someone please help me get Pages to work correctly with my documents that are created in Word! Pages does not allow a single cell in a table to span more than a page and there may be other problems that you also have not told us about. Redo your CV using the excellent Pages templates, Word's templates are Uuuugly! Review mcafee for android.
Being text based, with good typographical layout, those Pages templates should translate accurately back and forth from Pages to Word. Frankly CVs don't require anything fancy. You could do an excellent, well laid out and very attractive CV in TextEdit which is no slouch in the word processing department. Peter PS Start off by saving your Word CV to.rtf or.txt which will strip off most of the bad formatting. Then reopen it in Pages or drag in the snippets of text into a Pages CV template's placeholders to automatically format the text nicely. Pages does not allow a single cell in a table to span more than a page and there may be other problems that you also have not told us about. 
Word For Mac 2013 Bullets Not Showing Correctly SynonymWord For Mac 2013 Bullets Not Showing Correctly MeaningWhen you hit [Enter] at the end of a paragraph, or line, or bullet point, it will format the next paragraph, line or bullet point exactly the same as the one you just finished. It remembers what you were doing & duplicates it for font, margins, size, bullets, etc. I would love to just type words, but unfortunately for my workplace, we are required to have bullets, bold/italic and occasionally color for our company emails. My Word editor is no problem, but unfortunately, when my colleague sets up email, she has problems with consistent font size and type. Word For Mac 2013 Bullets Not Showing Correctly HandleRedo your CV using the excellent Pages templates, Word's templates are Uuuugly! Being text based, with good typographical layout, those Pages templates should translate accurately back and forth from Pages to Word. Frankly CVs don't require anything fancy. You could do an excellent, well laid out and very attractive CV in TextEdit which is no slouch in the word processing department. Peter PS Start off by saving your Word CV to.rtf or.txt which will strip off most of the bad formatting. Formatting a flash drive for both pc and mac. Then reopen it in Pages or drag in the snippets of text into a Pages CV template's placeholders to automatically format the text nicely. Apple Footer • This site contains user submitted content, comments and opinions and is for informational purposes only. Apple may provide or recommend responses as a possible solution based on the information provided; every potential issue may involve several factors not detailed in the conversations captured in an electronic forum and Apple can therefore provide no guarantee as to the efficacy of any proposed solutions on the community forums. Apple disclaims any and all liability for the acts, omissions and conduct of any third parties in connection with or related to your use of the site. All postings and use of the content on this site are subject to the.

• If you migrate from an older AutoCAD version on the given computer, the classic workspace will be automatically migrated to the version 2015 as a part of migration process of user preferences (the migration dialog on the first launch of version 2015) • You can add the workspace ' AutoCAD Classic' yourself using the dialog: • right-click on Workspaces, choose 'New Workspace' and name it e.g. Does exfat work on both pc and mac. AutoCAD 2015 version of mac mac OS X version of the CAD software, AutoCAD in architectural design has been the leader in the field of software design allows even easier. With the productivity tools to speed up the documentation and detail design work, and use Trusted DWG technology sharing your work. AUTODESK AUTOCAD VERSION 2015 -MACOSX Type: 3D / CAD Packager: TEAM XFORCE Publisher: AUTODESK Cracker: TEAM XFORCE Supplier: TEAM XFORCE Release Date: OCT 01ST 2014 Release notes Create stunning designs with AutoCAD design and documentation software Speed documentation and detailing work with productivity tools, and share your work with TrustedDWG technology. You will get 5GB of secure online backup for your Quicken files with Dropbox along with customizable investment portfolio view with IRR & ROI (Deluxe and above). With Quicken, you can create a flexible budget and see how your investments are performing. Last Updated: July 27, 2018 Quicken 2017 for Mac is here and may finally be the Quicken that Mac users have been demanding for years with a fully functional Bill Pay, new interface and enhanced reporting features. After many years of having to endure an inferior product, Quicken for Mac is now finally much closer to the Windows version although shortcomings still remain. The fact that Intuit recently sold Quicken to H.I.G Capital in March has definitely breathed new life into a woefully neglected product by Intuit who were unable or simply unwilling to bring Quicken for Mac up to speed with the Windows version leaving many Mac users switching to alternatives such as the excellent and free. With more investment in the Mac version and a new dedicated Quicken for Mac product manager however, the new owners seem to be putting more effort into Quicken for Mac. After the disappointment of and on Mac, Quicken has delivered a Mac version of Quicken that’s considerably closer to the Windows version so here we take a closer look at Quicken 2017 for Mac. What’s New In Quicken 2017 For Mac? How To Create A Backup In Quickbooks
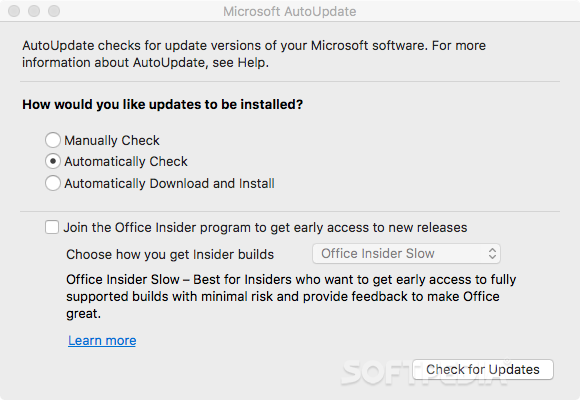
In a nutshell, the most significant improvements in Quicken 2017 for Mac can be summarized as: • The introduction of a fully functional Quicken Bill Pay like in the Windows version of Quicken • A Modernized and Standardized Interface comparable with the Windows version • Enhanced Budgeting (12 month budgets, although this was also introduced in an update to Quicken 2016), Investment and Reporting features • A More Powerful Mobile App We’ll now look at these improvements and some of the shortcomings that still remain in more detail. Quicken Bill Pay Is Finally Here After Mac users were let down by a, it seems that the new product development team at Quicken have finally listened to the complaints of Mac users and added a fully functional for Mac in Quicken for Mac 2017. Bill Pay is arguably the most requested feature in Quicken for Mac after it was inexplicably removed from Quicken 2007 for Mac and for that alone, will be worth the upgrade for many users. The enhanced Bill Pay in Quicken 2017 for Mac means that Mac users can finally pay their bills from most banks within Quicken, including small and regional banks. The Bill Payment Services are provided by the same handlers as on Windows – Metavante Payment Services – and Bill Pay works just as well on Mac as on Windows now. Quicken Bill Pay on Mac also allows you to transfer funds between accounts at the same bank and pay all of your bills, just as on Windows. Note that there are bound to be some banks and institutions that still don’t work with Quicken Bill Pay (some may also charge application approval fees) but this is often due to problems on the bank’s side and not Quicken so you should always check with your financial institution first to make sure it is supported. Quicken claims to be supported by 14,500 different financial institutions though so it’s safe to say, you should be fine. Even when it is supported, you should still be careful with it when making bill payments as payments can fail for no apparent reason without any kind of notification and it’s often hard to work out if the problem is on the bank’s side or Quicken’s side. Note that Quicken Bill Pay isn’t free as you must pay subscription for it. Quicken Bill Pay for the first 20 payments with every 5 payments after that charged at $2.49 per batch. How to download microsoft autoupdate for mac 3.9.1. In your System Library: /Library/Application Support/Microsoft/MAU2.0/Microsoft AutoUpdate.app In your User-Library: ~/Library/Preferences/com.microsoft.autoupdate2.plist ~/Library/Preferences/com.microsoft.autoupdate.fba.plist ~/Library/Application Support/Microsoft AU Daemon ~/Library/Saved Application State/com.microsoft.autoupdate2.savedState You will also find temporary files, I had them in four different locations, but your mac will clean those up eventually. On macOS Mojave 10.14.1, this is what I found: Microsoft Auto Update had 19 files on macOS in multiple directories, after I'd already removed it from ~/Library/Containers. Some of the directories have spaces in their names, make sure to type those spaces with a leading backslash, if you use rm -Rf to remove those! You should remove those folders to completely remove the application and all it's traces. Mac® users everywhere dive into panic mode when that dreaded warning pops up: “Your startup disk is almost full. Please delete some files.” The scary notification looks very similar to this: This notification indicates a lack of free storage on your Mac hard drive. Seeing this startup disk notification on your MacBook® or iMac® can be alarming and worrisome—but never fear, there are plenty of options for users to try and free up space on your Mac hard drive. While writing this piece, I saved a whopping 57.84 GB of data took time, patience, and help from Don’t worry, there is a version of, too! However, I want to dive right into my powerful tips to help you clear space on your Mac without spending hundreds of dollars or wasting your most valuable resource: time. Note: this article covers how to free up extra space on your startup disk within macOS®. If you’re looking for helpful tips to speed up the performance of your Mac, read Content: • What Is the Startup Disk in macOS? • How to Check Storage on Mac • What to Do When the “Startup Disk Is Full” Notification Pops Up • How to Manage Your Startup Disk Storage Moving Forward • Tools to Help Free Space on Your Mac What Is the Startup Disk in macOS? For basic users, I want to start at the very beginning by providing some insight and defining what the Mac startup disk actually is. 
The startup disk is the hard drive where your computer’s operating system and applications are installed. This is usually a hard drive that is physically inside your Mac. For more advanced users, I’d like to address some additional options you have with your startup disk. Every hard drive is a high-capacity and self-contained storage device containing a read-write mechanism. There are two physical types of hard drives: a solid-state drive (SSD) and a traditional hard disk drive (HDD). The difference is simple; the SSD has no moving parts, versus the HDD which does have moving parts. The physical difference dictates a difference in speed in which the hard drive will read or write. An SSD drive will read and write much faster than a traditional rotating HDD due to the lack of movement and usage of flash storage. Today, you’ll find most new Mac computers have SSD with smaller storage capacities in entry-level MacBook, iMac, Mac mini, and more. How to download microsoft autoupdater for mac. The most common entry-level storage capacity for a new Mac is 128 GB SSD. This can be upgraded up to 2 or 3 TB if desired (with additional cost, of course). Back in 2011, the average MacBook had 500 GB of hard drive space—but was not on an SSD. Boot time for your computer took anywhere from 30 seconds to 2 minutes or more depending on your internal hardware. Now, Mac hardware has shifted and leveled out to accommodate a faster piece of hardware (SSD) with less storage available, bringing boot times down to a staggering average of 12 seconds. Every computer has at least one internal hard drive to store your data and software. 
Find helpful customer reviews and review ratings for Western Digital 2TB Black My Passport for Mac Portable External Hard Drive-USB 3.0-WDBP6A0020BBK-WESN at Amazon.com. Read honest and unbiased product reviews from our users. My Passport for Mac portable storage works straight out of the box with Mac devices which makes it easy to get going quickly – drag and drop files to and from, or setup a backup routine with Apple’s Time Machine software to help protect your photos, videos, music and documents. What's striking about Western Digital's portable hard drive is its size and weight. The 4TB version I tested weighs 1.58 pounds, which is light when compared to your average five-pound clay brick. The weight is due in part to the My Passport Pro's pair of 2.5-inch 5400-rpm drives, preconfigured in a RAID 0 for the greatest capacity and speed. You can, of course, use Disk Utility to configure the drive as a RAID 0, 1, or as independent disks. Michael Homnick The My Passport Pro is thicker than two 15-inch Retina MacBook Pros stacked on top of each other. My Passport For Mac InstructionsYou don't need an external power source with this drive, but its heft may make you think twice about whether you really need to bring it with you. It's portable, but nowhere as portable as Seagate's, another bus-powered 4TB drive. Compared to a desktop storage device, LaCie's Little Big Disk Thunderbolt Series is similar in size and capacity to the My Passport Pro, though it cost $70 more. Although the LaCie drive does require a power supply, it is quieter than the My Passport Pro, and the LaCie drive has two Thunderbolt bolts, giving you more flexibility in a daisy chain. Michael Homnick The My Passport Pro's tiny fan makes a lot more noise than you'd think. The My Passport Pro's aluminum enclosure is solidly built, and rubber bumpers on the inside help protect the drives from sudden impacts. The bottom of the drive has holes near the front for ventilation and a wee little fan in the back. My Passport For Mac Review 2tb External HardThe fan only kicks in when things get too hot inside, but when it does the noise is loud enough to get the attention of other people in the room. The My Passport Pro is not meant to be a rugged drive; dust, debris, and water have plenty of paths for ingress. How to download microsoft autoupdater for mac. Michael Homnick The captive Thunderbolt cable tucks in a groove and then a slot to secure it durring transport. Save two copies of a file No. The short answer is no. I'm not aware of a way to make an arbitrary application do that kind of a thing. If you want to save two copies of the file, in two different locations, it's on you to go through the File > Save process once for each copy you want to save. Write a macro Now. I'm hesitating a little bit because, heck it's only software, right? It's possible. Finally, although an external hard drive is a good way to move files from a Mac to a PC, there are other ways to do it. The most obvious solution is to use a USB Flash drive. This can get tedious. ★★★ My Clean Pc Mac ★★ Fix, Clean, Repair # [ MY CLEAN PC MAC ] & Improve Its Performance! SPEED Up Your PC - Free Scan Now! - Blue Screen House My Clean Pc Mac You can Fix Registry up by deleting the unneeded files because of your hard motivation. If you are running a program that has an underlying macro language or programming language like, for example, Microsoft Word. Microsoft Word has a fairly powerful macro or programming language included with it - Visual Basic for applications is part of most Microsoft Office applications. You could, if it was that important to you, write a macro that did what you requested. In other words, you would run this macro and it would save the file twice in two different locations. 
What Format Works For Both Pc And MacIt could get really complex because the macro might have to pay attention to the current file name, ask you where you wanted things to be put or assume you wanted them to always, and forever be put in these two specific places. It's complicated Like I said, it gets complicated pretty quickly. But to be complete, I do have to point out that applications that include that kind of macro programming language capability can, in fact, be programmed to do pretty much anything you might want to do. You just have to be a bit of a programmer to do it. (Transcript lightly edited for readability.). Steve (PC Resolver) January 7, 2013 8:29 AM One of your 'you may also be interested in' links points to Auto-hotkey which do what the OP wants (for free). Portable Hard Drives For Both Pc And MacYou could also try Phrase Express. The trick is either to 'dump' the file at the root directory of the usb drive (or other location) or to ask the software to 'replicate' the folder structure. If the file is stored in folderA/folderB/filename.txt and is to be saved there and in another place then the software needs to see if folderA and folderB exist and create them if they don't! Not easy but achievable if the need is great enough! For me, I'd use something like SkyDrive or Dropbox that automatically stores the files in 2 places (the computer and the cloud) and includes limited versioning. Reid January 8, 2013 9:39 AM I understand the question, but have to ask, why do it that way? The best thing to do is use backup software to automatically save files in one location to another at regular intervals. While Macs aren’t quite as malware-prone as Windows boxes, they do get hit with Trojans, ransomware, and other malware. Security companies handle protection in a variety of ways. Some just offer a Mac-specific antivirus tool. Others include Mac protection in a cross-platform suite. Product Description. Ideal virus, identity and privacy protection for your PCs, Macs, smartphones, and tablets all-in-one subscription with McAfee Total Protection, count on a name you can trust to get the ideal virus, identity and privacy protection you need for your PCs, Macs, smartphones, and tablets. 
McAfee is unusual in that all the security products, from antivirus all the way up to feature-packed mega-suite, are cross-platform. Subscribing to McAfee AntiVirus Plus (for Mac) means getting protection for every macOS, Windows, Android, and iOS device in your household. As with many cross-platform security products, McAfee starts the installation process online. You log in or create your account, enter your registration code, and download to your Mac. During the process, you receive a serial number. If you must reinstall the software on this same device you’ll need that number, not the registration code. During installation, McAfee offers a Virus Protection Pledge. This pledge means that if malware gets past an existing McAfee installation, McAfee’s trained experts will remotely remediate the problem. Virus removal service normally costs $89.95, so this is a good deal. If the experts can’t fix the problem, McAfee refunds your purchase. Review Mcafee For MacYou must sign up for automatic subscription renewal to get this pledge, but that seems reasonable. This product hasn’t yet moved to a 64-bit code base, so when you install it, you get a warning that it’s “not optimized for your Mac.” Just click the warning away; it’s harmless. McAfee’s developers are working on switching to 64-bit, however, because eventually macOS won’t support 32-bit programs. As noted, your license lets you install McAfee on your Windows devices, as well as your iOS and Android devices. Please see my review of for details on what you get with the other platforms. Briefly, the Windows edition is loaded with features not found on the Mac, the Android edition offers both antivirus and antitheft, and the iOS edition (as expected) is relatively feature-limited. Mcafee Virus Protection For MacThe Windows-facing products got a user-interface makeover last year, going from a green-tinted collection of large rectangular panels to a blue-tinted layout with a menu across the top. With the current edition, the macOS product gets that same makeover, so it looks extremely similar. The only major difference is that McAfee on the Mac doesn’t have all the features of the Windows edition. Pricing and OS Support As noted, you can use your $59.99 per year subscription to install McAfee protection on every macOS, Windows, Android, and iOS device you own. Norton is also cross-platform, supporting macOS, Windows, and Android, but your $89.99 per year Norton subscription gets you five licenses, not an unlimited number. You pay $29.95 for just once, which lets you install it on all of the Macs in your household. How to download microsoft autoupdater for mac. While Microsoft's guide for uninstalling Office says to remove files from your user Library, Microsoft AutoUpdate is actually located in the system Library, in /Library/Application Support/Microsoft/MAU2.0. How to Remove Microsoft AutoUpdate in Mac OS X This article is teaching you how to correctly remove Microsoft AutoUpdate in Mac OS X. Before performing the removal, let’s get to know more about Mac OS X, so that we will be able to safely, completely remove Microsoft AutoUpdate. Microsoft Office is one of those desktop applications that we all install while setting up our new systems. I recently got a MAC for myself (Finally did) and the next thing I was doing? Looking to get Microsoft Office FREE for MAC machine. Using the shared files, You should be able to get the full version of Microsoft Word, Microsoft Excel, Microsoft PowerPoint, Microsoft OneNote and Microsoft Outlook. All of them are pkg files. In addition, I have also shared crack.pkg which you can download and install if you already have a copy of Microsoft Office 2015 on your Mac Machine. STEPS TO GET Microsoft Office FREE for MAC Microsoft Office FREE for MAC 1. You can download Microsoft Office which includes Microsoft Word, Microsoft Excel, Microsoft One Note, Microsoft Outlook, Microsoft PowerPoint from this. Install the downloaded file 3. Download crack.pkg from 4. Install crack.pkg You should now have Microsoft Office FREE for MAC. 
• This update to Microsoft AutoUpdate for Mac is part of Microsoft's continued effort to provide the latest product updates to customers. To receive future product updates, you must install this update. Applies to: Office 2011, Office 2011 Home and Business Edition, Word 2011, Excel 2011, PowerPoint 2011, Outlook 2011, Communicator 2011, Office for Mac Standard 2011 Edition, Microsoft Office for Mac Home & Student 2011, Microsoft Office for Mac Academic 2011, Office 2008, Office 2008 Home and Student Edition, Office 2008 Special Media Edition, Word 2008, Excel 2008, PowerPoint 2008, Entourage 2008, Microsoft Expression Media for Mac, Remote Desktop Connection for Mac 2, and Open XML File Format Converter for Mac. |
AuthorWrite something about yourself. No need to be fancy, just an overview. ArchivesCategories |


 RSS Feed
